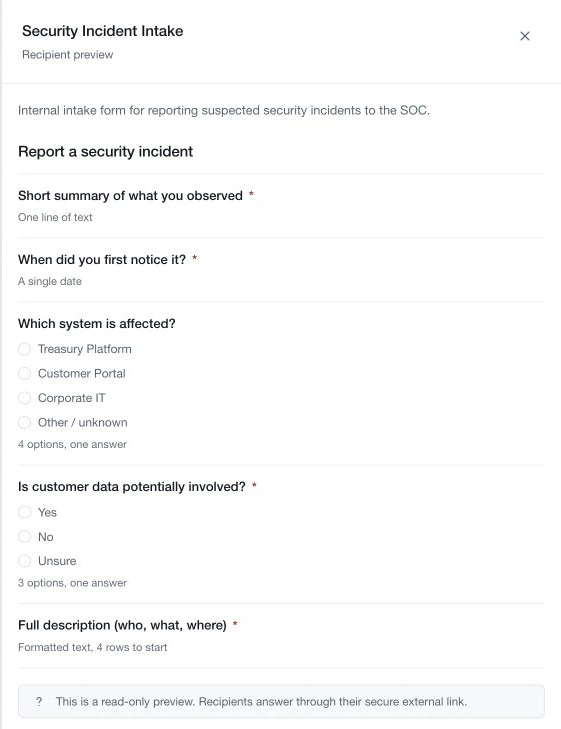
A form combines questions with layout elements. Build it in Design, use Preview to check the reading order, and save the definition before making it available to send.
Create the form
- Open Forms → Library, then New form.
- Enter a clear Name and, optionally, What it is for. Explain the intended scope, audience and use of the answers.
- Choose Create the form. This creates an In progress form; its questions come next.
- Open Design and choose Add element.
For example, a supplier intake might ask for the service provided, production access, data handled and continuity dependencies. Keep each question focused on one decision and include an appropriate “Unknown” option where uncertainty is meaningful.
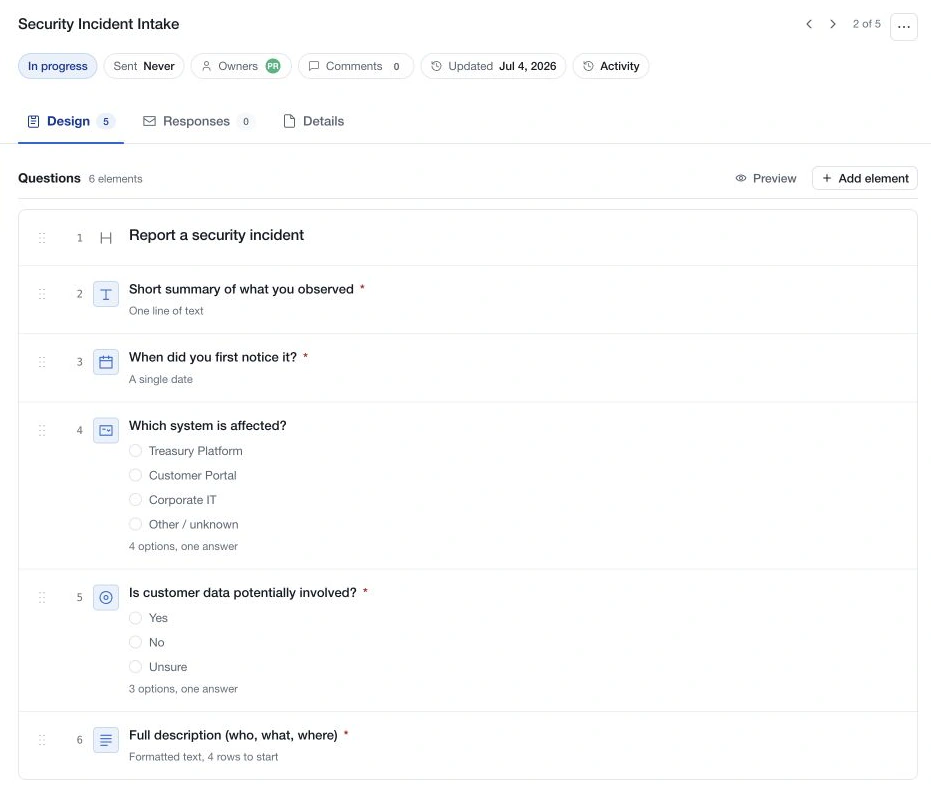
Choose the right element
| Element | Appropriate use |
|---|---|
| Text input | A short, single-line answer. |
| Rich text area | An explanation with formatting. |
| Number input | A quantity, with configured bounds where needed. |
| Email input | An email address. |
| Date picker | One date. |
| Checkbox | Multiple choices from a set. |
| Radio group | One choice, with the options visible. |
| Select menu | One choice from a menu, or several when Allow multiple selections is enabled. |
| File upload | Supporting files within the configured types and limits. |
| Title, Subtitle, Divider | Organize the form without adding an answer field. |
Give each question a meaningful Label, add a hint where useful, and enable Required field only when the recipient must provide an answer. Configure choice options explicitly. For uploads, review the displayed file count, size and accepted-type settings before saving; do not assume the same limits apply to every question.
The question count excludes layout elements. A form containing one title and five answer fields therefore has six elements and five questions.
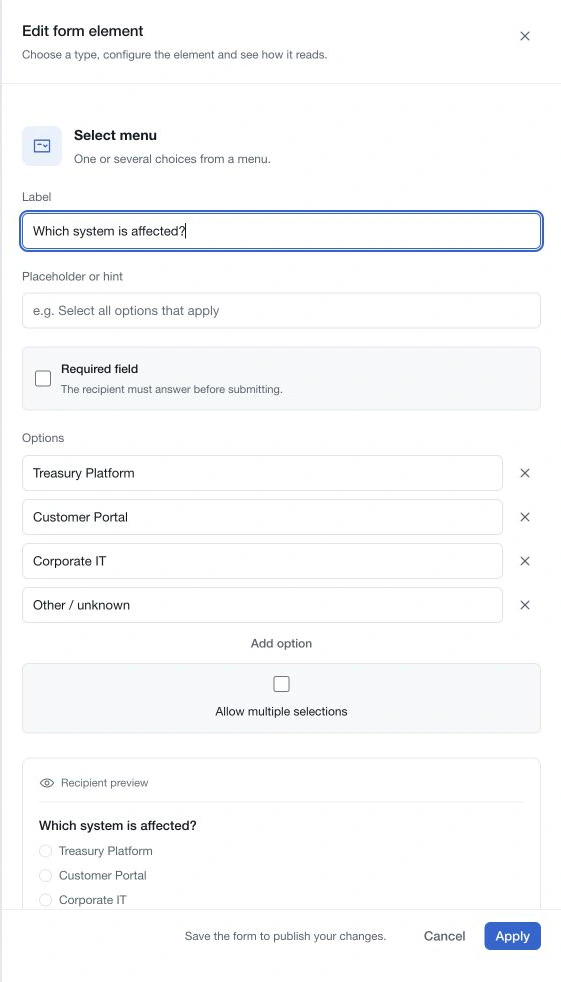
Understand saving
Question additions and edits are staged. The element drawer shows a recipient specimen while you configure it. Use Add element for a new question or Apply for an edited one, then use the form's Save changes control to persist the current draft. Read the unsaved-change indicator before leaving.
Use Cancel in the element editor to restore that element's previous state or remove the unsaved new element. Discard abandons the pending form changes. Closing a drawer can retain a draft, so closing alone is not evidence that a change was discarded. Check that the unsaved indicator clears and the original questions are restored.
Reordering saved elements is a separate immediate action. Use the drag handle or its Up and Down keyboard controls, then verify the resulting order. It does not use the same save step as adding a question.
Review the definition
Open Preview to inspect the recipient-facing wording and sequence. This is a read-only preview; it does not send a form or collect a real response. Check that labels, choices, hints and required markers are understandable together.
Use Details to maintain the purpose and categories while editing is available. Owners and comments provide accountability and discussion. Before completion, resolve unsaved changes and review the entire questionnaire. Once the form has been sent, create a separate revised form when the questions need to change.