

Add evidence where it is used: a framework requirement, policy, control, system, third party, risk demand, risk assessment, remediation plan, audit response or business profile record. Confirm the selected item and version before attaching anything.
Add a file
- Open the source record and its Evidence or Evidences action.
- Choose the file attachment action when it is available. For example, a system record offers Add evidence → Upload file → Choose files.
- Check the displayed restrictions and workspace storage availability.
- Select the intended files. In the attachment controls, choosing a file can start its upload immediately; it is not just a preview.
- Wait for the upload result, then verify that each expected attachment appears on the source record.
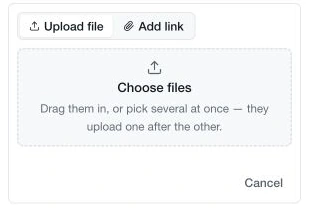
Use clear names that identify the subject and assessment period. Where a newer document supersedes an older one, follow your retention process before removing the original. Evidence attachment is separate from saving other fields on the page.
Add a link
Use the link attachment option, enter a descriptive name and the full HTTP or HTTPS address, then submit the link. A name such as “Access review — Q3” is more useful than an unexplained URL.
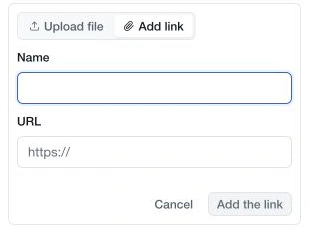
A link keeps its target in the external system; it does not copy the target document into CSFaaS or grant readers access there. Check that the intended reviewers can open the destination and that it will remain available for the required retention period.
If an action is unavailable
Attachment rights follow the source module and record state. Check that you are working on the intended editable version and have the required permission. A read-only or completed record may restrict changes.
When workspace file storage is disabled, the interface provides links-only behavior for new attachments. Existing stored evidence is not erased by that setting. Review the current allowance and configuration in the workspace before relying on an old quota or price from previous documentation.
After attaching, open the item in Evidences to verify its source association and available preview. Form answer uploads are managed with the response rather than added automatically to this central library.