

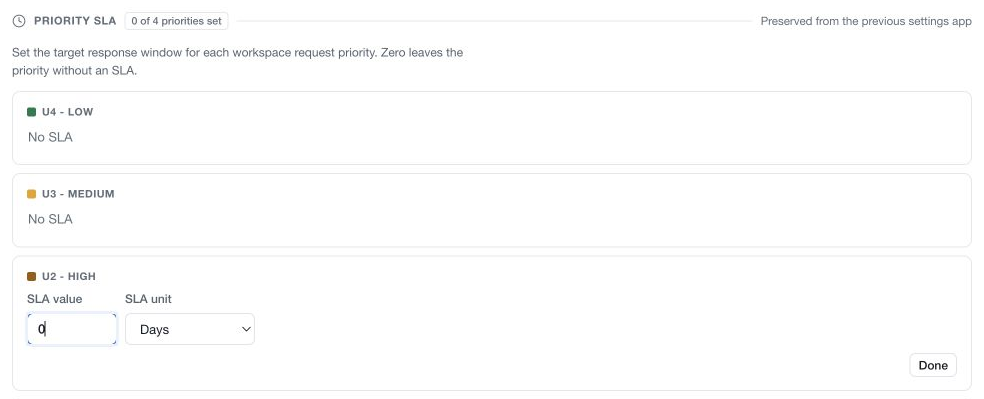
Open Settings → Risk demands and find Priority SLA. It defines the target response window associated with each workspace request priority.
Configure a priority
- Select the edit control beside the priority.
- Enter the SLA value and choose the displayed unit: Hours, Days or Weeks.
- Finish the field edit and review the resulting duration.
- Save the pending configuration with the page bar.
Zero leaves that priority without an SLA. If the list has no priorities, review the request-priority catalogue before configuring the defaults.
Choose durations the team can use as an operational commitment, with a clear understanding of who is responsible for the next action. The default duration is separate from a particular demand's current due date.
Review actual deadlines
On a demand, read its current due date and workflow state. An SLA default does not prove when a particular demand is due, and changing the configuration is not a substitute for reviewing deadlines on existing work.
Use the demand's deadline controls and recorded justification when a date needs to change. Confirm the saved date and its history after an update. A countdown or overdue indicator describes timing; it does not establish that an assessment is complete.
Remediation plans have their own deadlines. Review those in the plan rather than assuming a demand's priority default reschedules linked remediation work.