

Open Settings → General to manage the workspace's name, description and mark, review its owner, or leave the workspace.
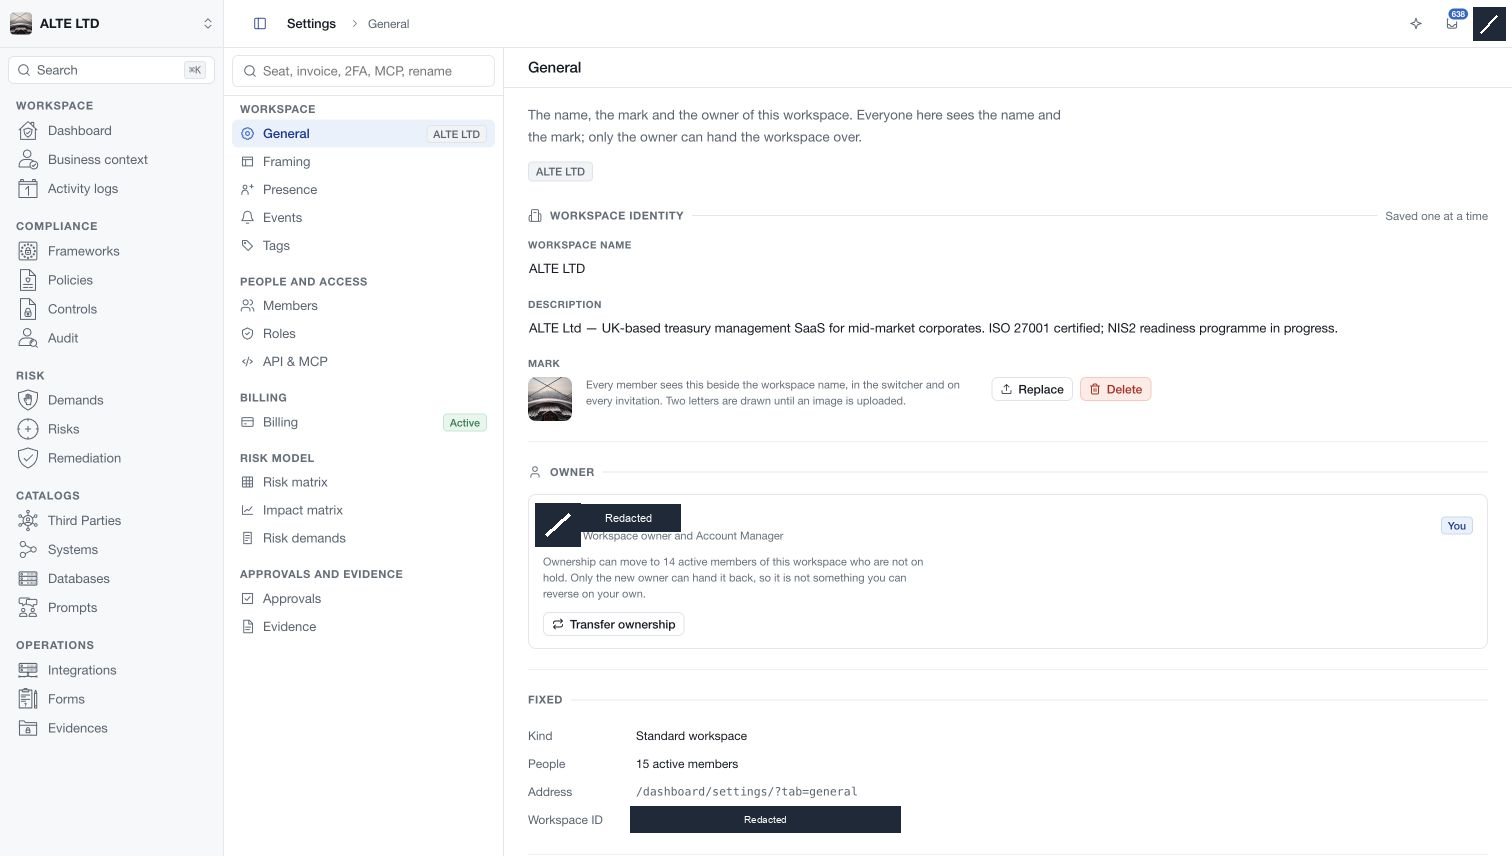
Edit the name or description
Select the edit control beside the field, enter the new value and use its save action. The workspace name allows up to 15 characters. These fields are Saved one at a time; saving the name does not require a separate page-wide save.
The name and mark appear in the workspace switcher and invitations. Choose a short name that members can distinguish from their other workspaces.

Change the workspace mark
Select Replace beside the current mark to upload an image, then follow the picker and its validation. Confirm the resulting mark after the upload succeeds. Delete beside the mark removes that image after confirmation; it does not delete the workspace.
When there is no image, the interface uses letters derived from the workspace name.
Transfer ownership
Only the current workspace owner can transfer ownership. The Owner section lists the current owner and indicates whether eligible active members are available.
Select Transfer ownership, choose the intended member, then read and complete the handoff confirmation. The selected member becomes the owner immediately after a successful transfer. Only the new owner can transfer it back; the former owner cannot undo the handoff alone.
If no eligible member is available, resolve the membership first in Settings → Members. Assigning someone a role is separate from transferring ownership.
Leave the workspace
Leave workspace removes your membership and activates another accessible workspace. Read the confirmation and resolve any displayed restriction. The owner may need to transfer ownership first, and the app does not allow leaving the account's only accessible workspace.
After leaving, you lose access unless membership is restored through the appropriate invitation or administration process. If you intend to delete your account instead, use My profile and review its separate deletion process.